Applications with fast moving objects, often need a high framerate and short exposure time. Short exposure time comes with less light, meaning a light sensitive lens and image sensor are required.
Here is an overview of settings that will help you find the optimal settings in your high-speed application. You can use this as a guideline.
Set the correct Exposure Time
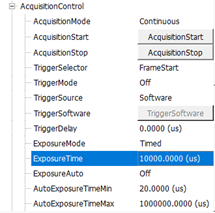
The first setting to optimize is the exposure time. The maximum exposure time is 1/framerate. If you want to achieve 200fps, the maximum exposure time is 1/200= 5ms.
The lower the exposure time, the darker the image, therefore you want your exposure time to be as long as possible to increase the brightness. However, it is limited by the calculated maximum exposure as shown above. Another important limitation you need to be aware of is the maximum exposure time to avoid motion blur. This is explained further in this article. In some applications motion blur is acceptable, in these cases a longer exposure time than the calculated value is possible.

Use Gain to improve the brightness of the image
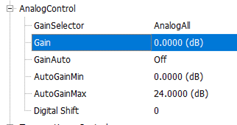
Increasing the analog gain setting will also increase the brightness of the image. When the amplitude of the sensor output signal remains constant, increasing the gain makes the response curve steeper, which makes the image brighter. For every 6dB increases of the gain setting, the gray value of the image will double. For example, when the camera has a gain of 0dB, the image gray value is 126, and if the gain is increased to 6dB, the image gray will increase to 252.
Thus, increasing gain can be used to increase image brightness.
Note that increasing the analog gain will amplify the image noise.

Use Digital Shift to further increase the brightness
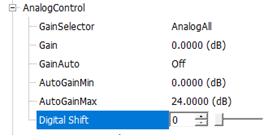
Some of our cameras support the digital shift feature. It is commonly used to enhance the brightness of the images. The enhancement occurs as a result of increasing every pixel’s brightness individually by ‘shifting’ the binary values to the left. Setting the digital shift value to n results in a logical left shift by n on all pixel values.
In the end this procedure multiplies every pixel value by 2n. This will result in a brighter image, but also increase the noise. If the resulting pixel value is greater than the maximum value possible for the current pixel format, it is set to the maximum value.
To configure the digital shift factor, change the value of the “DigitalShift” parameter.
However, not every model supports this feature. If your model does not support it, you can change the gain value to get a similar effect. Please note that digital shift will also increase the noise levels.

Binning to increase sensitivity of the image sensor
Some cameras have the option to use binning. With binning you combine the value of 4 pixels resulting in the camera being 4 times more light sensitive. However, the camera resolution is divided by 4 as well.
More information can be found in this
article about camera binning.
Use an image sensor with a bigger Pixel size
The pixel size has a big influence on the light sensitivity of the camera. Bigger pixels will catch more light than smaller ones. Using an image sensor with a 6.9µ pixel instead of a 3.45µ pixel will result in four times more light (3.45*3.45=11.90µm² , 6.9*6.9=47.61µm²).When comparing sensors from different manufacturers or even from the same manufacturer but different generations of image sensors, a bigger pixel will not always result in a more light sensitive pixel. The newer the image sensor, the more light sensitive the pixel is for the same pixel size.
Monochrome/Color cameras
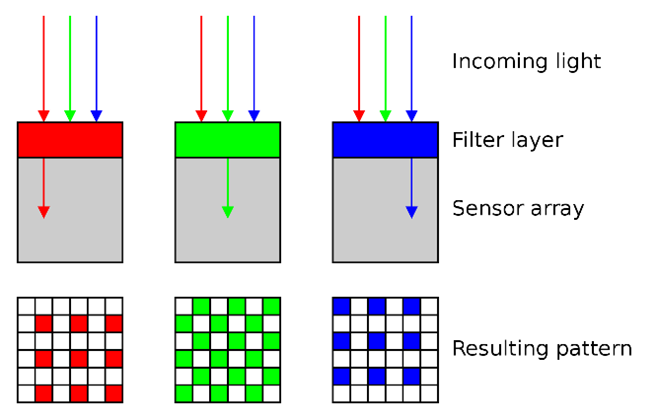
Monochrome cameras are up to three times more light sensitive than colored cameras. This is due to colored cameras using a Bayer filter to generate a colored image. This Bayer filter blocks most of the light from reaching the sensor pixels. As a result, only the light of the specific filter color will reach the sensor pixel.
Moreover, monochrome cameras also generate a sharper images, as there is no image processing like it is in colored cameras.

Source:
Bayer pattern on sensor profile - Bayer filter - Wikipedia
Selecting the best lens with a low F number
Lenses come with different F values which determine how much light they let through. Most of them have a manual Iris, where you can change the F value of the lens. For the maximum amount of light passing through, you should choose a Lens with a low F value, such as F1.4. An F1.4 lens will capture twice as much light as F2.0, but will decrease the depth of field.
More light to get a better camera image
If your camera image is still too dark and further fine tuning of above settings is not possible, adding extra light can be the solution.
If you have questions about lighting or need help choosing the right light, please contact us.
We will find the optimal lighting for your case.


